

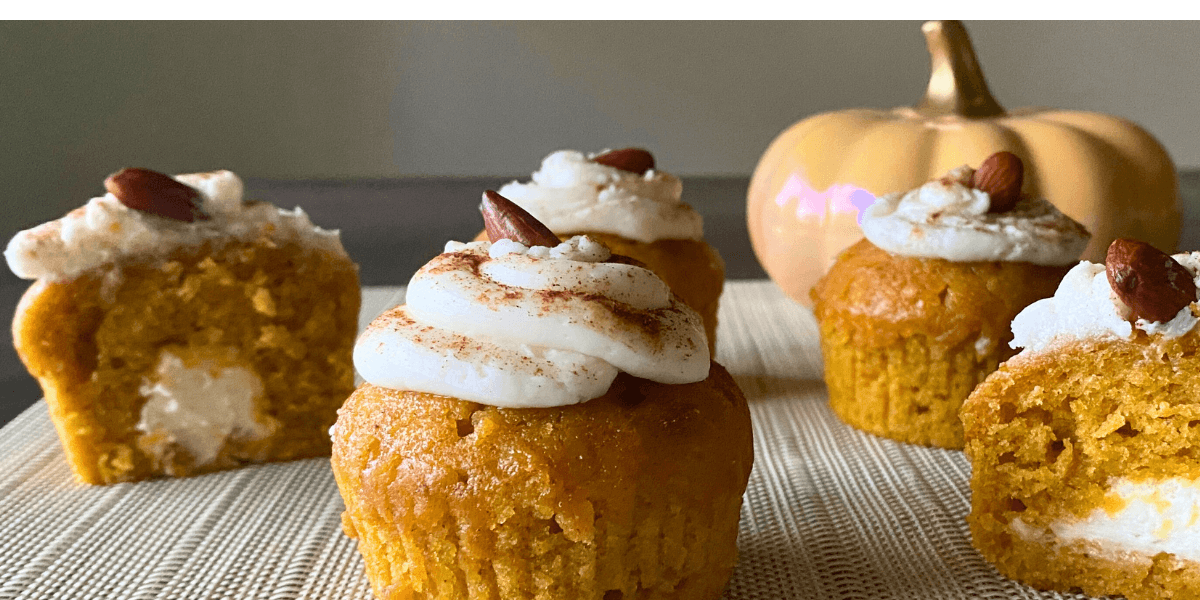
Mastering Gluten-Free Baking: Your 2026 Guide to Fluffy, Flavourful Results
TL;DR: Gluten-free baking requires a strategic approach to ingredient selection, precise measurements, and understanding how different flours and binders interact. By focusing on proper hydration, using appropriate leaveners, and adjusting baking techniques, you can achieve delicious, well-structured baked goods that rival their gluten-containing counterparts. Patience and experimentation are key to mastering this rewarding culinary art.
Quick Answer: Achieving successful gluten-free baked goods involves carefully balancing a blend of gluten-free flours, incorporating essential binders like xanthan gum or psyllium husk for structure, and meticulously controlling moisture levels and baking temperatures to compensate for the absence of gluten’s elasticity and binding properties.
Context: Why This Matters in 2026
In 2026, the demand for high-quality gluten-free products continues to surge, driven by health consciousness, dietary requirements, and a growing appreciation for diverse culinary experiences. For home bakers and commercial kitchens alike, mastering gluten-free techniques is no longer a niche skill but an essential one. This guide provides the foundational knowledge and advanced strategies needed to consistently produce exceptional gluten-free baked goods.
The Foundation: Understanding Gluten-Free Flours and Binders
The cornerstone of successful gluten-free baking lies in selecting and blending the right flours. Unlike wheat flour, which contains gluten for structure and elasticity, gluten-free flours each bring unique properties to the mix. In practical terms, a single gluten-free flour rarely performs as well as a thoughtfully combined blend. For instance, rice flour offers lightness, tapioca flour contributes chewiness and elasticity, while sorghum or oat flour provide body and a subtle flavour. Almond and coconut flours, rich in protein and fibre, add moisture and richness but must be used sparingly to avoid dense results.
The key difference is that gluten-free flours absorb liquids differently. Some are highly absorbent, leading to dry bakes if not properly hydrated. Pre-mixed gluten-free blends can be convenient, but always scrutinise the ingredient list. The best blends mimic wheat flour by combining starches and whole-grain flours. If a blend is predominantly starches like corn or potato, it may lack nutritional value and complex flavour. Crafting your own blend offers superior control, allowing customisation based on the specific baked good.
Binders are indispensable in gluten-free baking, acting as the ‘glue’ that gluten naturally provides. This works because they create a matrix that traps air, provides elasticity, and holds ingredients together. Xanthan gum is excellent for cakes and cookies, preventing crumbling and retaining moisture. For breads, psyllium husk powder is a game-changer, imparting flexibility and a desirable chewiness akin to gluten. Alternatives like chia or flax seeds, when mixed with water, form a gel that naturally binds ingredients, offering a more natural option for those avoiding gums.
Precision and Hydration: The Science of Gluten-Free Dough
Precision is paramount in gluten-free baking, far more so than in traditional baking. Gluten-free flours vary significantly in density, making weight-based measurements essential for consistency. The main reason is that even a slight deviation in flour quantity can drastically alter the final texture, leading to overly dry or collapsed bakes. A digital kitchen scale is an invaluable tool for ensuring accuracy. Sifting flours before mixing also helps to aerate them, preventing clumps and contributing to a lighter texture. Gentle mixing is crucial; overmixing can deflate batters, resulting in heavy baked goods.
Adjusting moisture levels is another critical aspect. Gluten-free flours tend to absorb more liquid, often requiring an increase of 10-15% compared to traditional recipes. Adding a bit more milk, oil, or an extra egg can significantly improve texture. Ingredients like yoghurt, mashed banana, or applesauce not only boost moisture but also enhance flavour. For bread recipes, embracing a stickier dough is vital. Gluten-free doughs often appear wetter than their conventional counterparts, but resisting the urge to add more flour ensures a tender crumb. This extra moisture is necessary for proper hydration and structure development.
Allowing batters and doughs to rest is a simple yet powerful technique. Resting for 20 to 30 minutes enables flours to fully hydrate, resulting in a smoother texture and less grittiness in the final product. In practical terms, this hydration time allows starches to swell, improving elasticity and rise. For items like pancakes and muffins, room temperature resting suffices. For bread doughs, covering and refrigerating overnight can deepen flavour and further enhance structure without the risk of overproofing.
Optimising for Texture and Flavour: Eggs, Leaveners, and Fats
Eggs play a multifaceted role in gluten-free baking, contributing not only richness but also crucial lift and structure. Slightly increasing the number of eggs can yield fluffier cakes and muffins. For egg-free alternatives, whipped aquafaba or a mixture of ground flaxseed and water can provide similar structural support, though they may subtly influence flavour. Leavening agents, such as baking powder and baking soda, often require adjustment. Gluten-free batters are typically heavier, so adding approximately 25% more leavener than a standard recipe can ensure adequate rise and prevent dense, flat results.
Temperature and timing are equally important considerations. Gluten-free batters lack the elasticity of their gluten-containing counterparts, often browning faster externally while remaining undercooked internally. To counteract this, baking at slightly lower temperatures and extending baking times by 5 to 10 minutes is often effective. For example, reducing the oven temperature from 180°C (350°F) to 170°C (325°F) and monitoring doneness with a skewer ensures thorough cooking. Covering loaves with foil partway through baking can prevent over-browning. Preheating the oven thoroughly is non-negotiable, as a fully heated environment helps to set the structure quickly before gases escape, preventing deflated or gummy textures.
To compensate for the often milder flavour profile of gluten-free flours, incorporating flavour and texture boosters is highly recommended. Toasted nuts, shredded coconut, or extracts like almond and vanilla can add depth. A pinch of salt enhances sweetness and balances overall taste. Texture boosters such as oats, chopped fruit, or chocolate chunks provide appealing contrast. For breads, brushing the crust with olive oil or butter before baking promotes beautiful browning and a delightful aroma. When it comes to fats, while butter offers rich flavour, liquid oils like olive or coconut oil often yield a moister, more tender crumb in gluten-free bakes. Balancing fat with flour and sugar is crucial; too much fat can result in greasiness, while too little can lead to stiffness.
Common Mistakes in Gluten-Free Baking and How to Avoid Them
Many common pitfalls in gluten-free baking stem from applying traditional baking assumptions. One frequent mistake is using a single gluten-free flour without blending, which often leads to poor texture and structure. Another error is neglecting binders, resulting in crumbly or dense products. Over-reliance on volume measurements instead of weight can cause inconsistencies due to varying flour densities. Additionally, under-hydrating doughs and batters is common, leading to dry bakes, as gluten-free flours absorb more liquid. Finally, baking at standard temperatures and times without adjustment can result in unevenly cooked goods.
Practical Next Steps for Your Gluten-Free Journey
To elevate your gluten-free baking, begin by investing in a reliable digital kitchen scale for precise measurements. Experiment with creating your own flour blends, starting with a base of rice flour, tapioca flour, and a whole-grain option like sorghum. Always incorporate a binder such as xanthan gum or psyllium husk, adjusting quantities based on the recipe type. Pay close attention to the consistency of your batters and doughs, adding extra liquid as needed to ensure proper hydration. Practice allowing your mixtures to rest before baking to improve texture. Finally, adjust your oven temperatures and baking times, opting for slightly lower heat and longer durations, and always use an oven thermometer for accuracy.
Frequently Asked Questions
Why do my gluten-free baked goods often turn out dry and crumbly?
This is typically due to insufficient moisture or a lack of proper binders. Gluten-free flours are very absorbent, so ensure you’re adding enough liquid and incorporating binders like xanthan gum or psyllium husk to retain moisture and provide structure.
Can I substitute gluten-free flours one-for-one with wheat flour?
Generally, no. Gluten-free flours have different absorption rates and structural properties. Successful gluten-free baking usually requires a blend of flours and the addition of binders to mimic the characteristics of wheat flour.
How can I prevent my gluten-free bread from being dense?
Ensure adequate hydration by not adding too much extra flour, allow the dough to rest for proper hydration, and use sufficient leavening agents. Psyllium husk can also significantly improve the texture and rise of gluten-free bread.
What is the role of xanthan gum in gluten-free baking?
Xanthan gum acts as a binder and emulsifier, providing elasticity and structure that gluten would normally offer. It helps prevent crumbling, improves texture, and aids in moisture retention, particularly in cakes and cookies.
Why is precision so important in gluten-free baking?
Gluten-free flours vary greatly in density and absorption. Small inaccuracies in measurement can significantly impact the delicate balance required for successful gluten-free baked goods, leading to undesirable textures or structural failures.
