

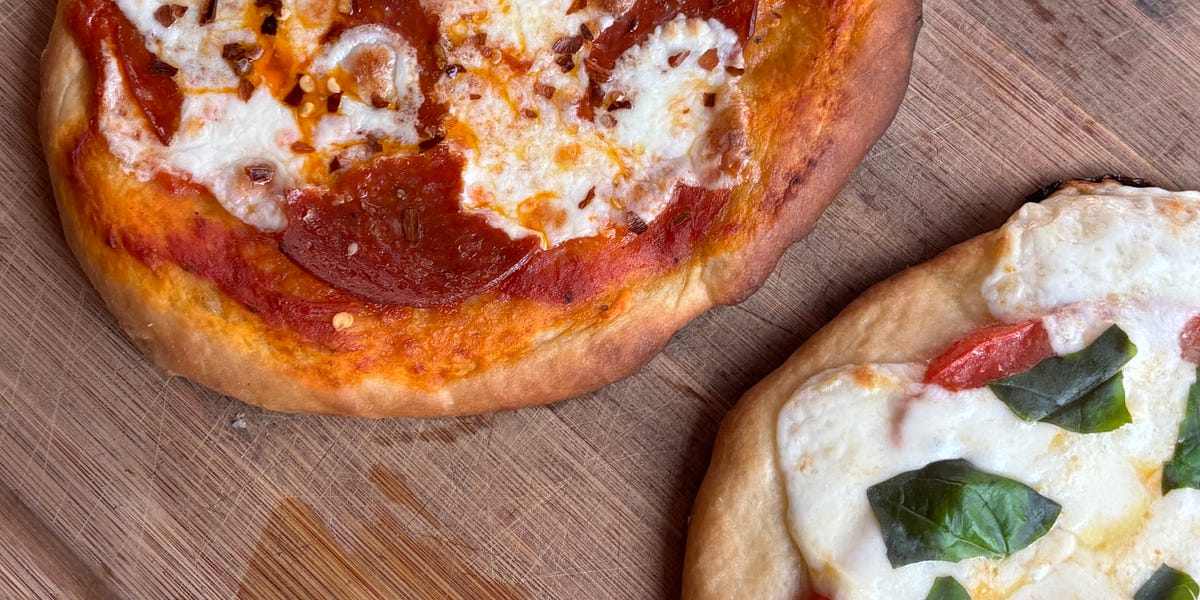
Mastering Homemade Pizza Dough: Your 2026 Guide to Perfect Crusts
TL;DR: Crafting your own pizza dough from scratch is a deeply rewarding culinary journey, transforming simple ingredients into a superior crust. This comprehensive guide covers everything from selecting the right flour and activating yeast to mastering kneading techniques and achieving optimal baking temperatures. By understanding the science behind each step, you’ll consistently produce delicious, authentic pizza that surpasses store-bought alternatives.
Quick Answer: Homemade pizza dough is made by combining flour, water, yeast, and salt, then kneading to develop gluten, allowing it to ferment for flavour and rise, and finally shaping and baking at high temperatures to achieve a perfectly crisp and chewy crust. The process, while requiring patience, offers unparalleled control over texture and taste, making it a cornerstone for exceptional pizza.
Context: Why This Matters in 2026
In 2026, the culinary landscape is increasingly focused on authenticity, quality ingredients, and the satisfaction of creating food from scratch. For home cooks, mastering homemade pizza dough isn’t just a skill; it’s an investment in superior flavour and a healthier, more controlled dining experience. This guide ensures you’re equipped with the knowledge to not only bake incredible pizza but also to understand the ‘why’ behind each crucial step.
The Essential Ingredients: Building Your Dough Foundation
Every exceptional pizza dough begins with a careful selection of core ingredients: flour, water, yeast, and salt. These four elements, when combined correctly, form the basis of your crust. Optional additions like olive oil and a touch of sugar can enhance flavour and texture, depending on the desired style. The key difference is that each ingredient plays a specific role in the dough’s final structure and taste, making their quality and proportion critical.
Flour choice significantly impacts the crust. Bread flour, with its higher protein content (typically 12-13%), is often preferred for its ability to develop strong gluten, resulting in a chewy and robust crust. All-purpose flour can be used, but it generally yields a softer outcome. For those aiming for an authentic Neapolitan-style pizza, ’00’ flour, a finely milled Italian variety, is ideal. This works because its fine texture and specific protein structure create a delicate, airy crust that blisters beautifully under high heat.
Water temperature and hydration are equally vital. Lukewarm water, around 38°C (100°F), is perfect for activating yeast without compromising its viability. The hydration level, expressed as a percentage of water to flour by weight, dictates the dough’s consistency. A common starting point is 65% hydration (e.g., 650g water for 1kg flour), providing a dough that is moist yet manageable. The main reason for precise hydration is to ensure optimal gluten development and a balanced dough texture.
Activating Yeast and the Art of Fermentation
Yeast is the living organism responsible for the dough’s rise, producing carbon dioxide that creates those desirable air pockets. Active dry yeast is a reliable choice, requiring activation in warm water with a pinch of sugar for about ten minutes until foamy. This process confirms the yeast’s vitality. In practical terms, seeing the foam indicates your yeast is alive and ready to work, ensuring a successful rise.
Instant yeast offers a more direct approach, as it doesn’t require prior activation and can be mixed directly with the dry ingredients. Regardless of the type, fermentation is crucial for flavour development. Longer fermentation periods, especially cold fermentation overnight in the refrigerator, allow enzymes to break down starches, resulting in a more complex, slightly tangy flavour and improved texture. This works because the slower process allows for a greater depth of flavour to develop.
Mixing, Kneading, and Gluten Development
Once the yeast is active, combine it with the flour and salt in a large bowl. A drizzle of olive oil can be added for richness. Mix until a shaggy, rough dough forms. This initial stage is about bringing the ingredients together before the real work begins.
Kneading is where the magic of gluten development occurs. Gluten, a network of proteins, provides the dough with its structure and elasticity. Kneading by hand for approximately ten minutes, using a push-and-fold technique, gradually transforms the dough into a smooth, pliable mass. The key difference between a poorly kneaded and well-kneaded dough is its ability to stretch without tearing. A simple test, known as the windowpane test, involves stretching a small piece of dough until it’s translucent; if it holds without ripping, it’s ready.
Proofing and Preparing for Perfection
After kneading, the dough undergoes its first rise, or bulk fermentation. Transfer it to a lightly oiled bowl, cover with a damp cloth or plastic wrap, and let it rest in a warm, draft-free place for one to two hours, or until doubled in size. This works because the yeast consumes sugars, producing gas that expands the dough. For enhanced flavour, consider a cold fermentation in the fridge overnight; this slows the yeast, deepening the taste profile.
Following the first rise, gently deflate the dough to release trapped gases. Divide it into portions suitable for your desired pizza size (e.g., 250-300g for a 12-inch pizza). Shape each portion into a smooth ball and allow them to rest for another 30 minutes. This second rest is crucial, as it relaxes the gluten, making the dough much easier to stretch without resistance. In practical terms, skipping this step will make your dough spring back, making it difficult to achieve the desired thinness.
Common Mistakes to Avoid for Superior Pizza Dough
Several common pitfalls can hinder your pizza dough success. One frequent issue is using water that is too hot or too cold, which can either kill the yeast or prevent its activation. Always aim for lukewarm water. Another mistake is insufficient kneading; under-kneaded dough will lack elasticity and result in a dense crust. Conversely, over-kneading can make the dough tough. The key is to achieve the ‘windowpane’ stage, indicating optimal gluten development.
Overloading toppings is another common error. While tempting, too many toppings release excess moisture, leading to a soggy crust. Keep toppings balanced and minimal to allow the crust to cook evenly and remain crisp. Lastly, not preheating your oven and pizza stone/steel sufficiently will result in a pale, undercooked crust. High heat is essential for a rapid rise and characteristic blistering.
Practical Next Steps: From Dough to Delicious Pizza
With your perfectly proofed dough ready, the next steps involve shaping, topping, and baking. Gently stretch the dough by hand, working from the centre outwards, leaving a slightly thicker edge for the crust. Avoid using a rolling pin, as it can compress air bubbles, leading to a flatter crust. If the dough resists, let it rest for a few minutes before continuing. This works because resting allows the gluten to relax, making it more pliable.
For toppings, keep it simple. A thin layer of quality tomato sauce, fresh mozzarella, and a few choice ingredients will let your homemade crust shine. Ensure your oven and pizza stone/steel are preheated to their maximum temperature for at least 45-60 minutes. This high heat is crucial for achieving a rapid, airy rise and a beautifully charred crust.
Transfer your topped pizza to the hot stone/steel using a floured peel. Bake for 7-10 minutes, or until the crust is golden brown and blistered. Once baked, let the pizza rest for a couple of minutes before slicing; this allows the cheese to set and prevents toppings from sliding off.
Frequently Asked Questions
What is the ideal water temperature for activating yeast?
Lukewarm water, between 35-40°C (95-105°F), is ideal for activating yeast. Water that is too hot can kill the yeast, while water that is too cold will slow down or prevent activation.
How can I tell if my pizza dough is properly kneaded?
Perform the ‘windowpane test.’ Take a small piece of dough and gently stretch it between your fingers. If you can stretch it thin enough to see light through it without it tearing, the gluten is well-developed, and the dough is properly kneaded.
Why is high oven temperature important for pizza?
High oven temperatures (250°C/480°F or higher) are crucial for rapidly cooking the pizza, creating a crisp crust, and achieving the characteristic blistering and airy texture. This quick bake prevents the dough from drying out and ensures toppings cook evenly.
Can I freeze homemade pizza dough?
Yes, homemade pizza dough freezes exceptionally well. After the first rise, divide the dough into portions, coat lightly with oil, and store in airtight freezer bags. Thaw overnight in the refrigerator before use, allowing it to come to room temperature before shaping.
What is the benefit of cold fermentation for pizza dough?
Cold fermentation, typically done in the refrigerator for 12-72 hours, significantly enhances the flavour and texture of pizza dough. The slow fermentation process allows for the development of more complex, nuanced flavours and improves the dough’s extensibility, making it easier to work with.
